User Tools
Sidebar
Table of Contents
Hemming
Preparing for hemming
Hemming stretch fabrics is probably the number one reason for purchasing a coverstitch machine. I have a dedicated coverstitch machine and this allows me to hem as I progress with a project. For sleeves and the legs of pyjama pants, I usually choose flat hemming. For T-shirt bottom hems, I prefer to hem in the round after assembling the T-shirt. Sometimes I prefer to hem baby sleeves in the round because it looks better and those little hands will be in the caregiver's line of view a lot of the time! ![]()
I will say more about working in the round later but I will first focus on the basics of hemming, how to prepare, choose the stitch and make it straight without special equipment.
Trimming seams
Pressing
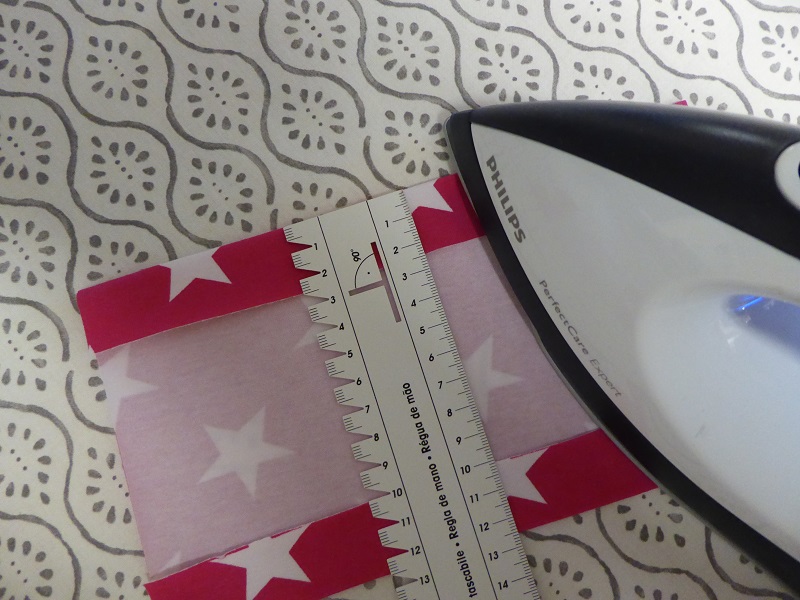
I do both, a well prepared and pressed hem and a lazy-fold-as-I-go hem. I recommend starting with a well prepared pressed hem because this way you will have more energy available to focus on stitching straight and observing the process.
Let's say I want a 2.5cm/ 1 inch hem, and I am going to use the 2 needle coverstitch.
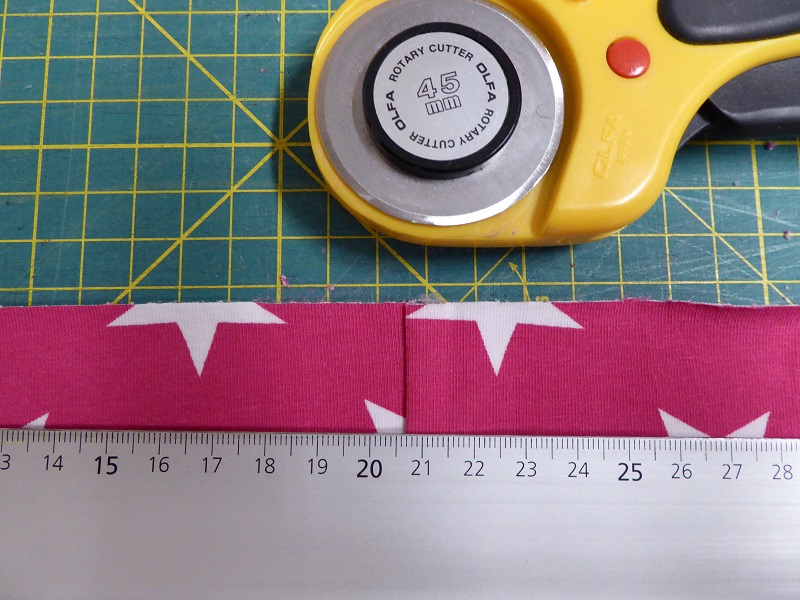
Snipping the side seam
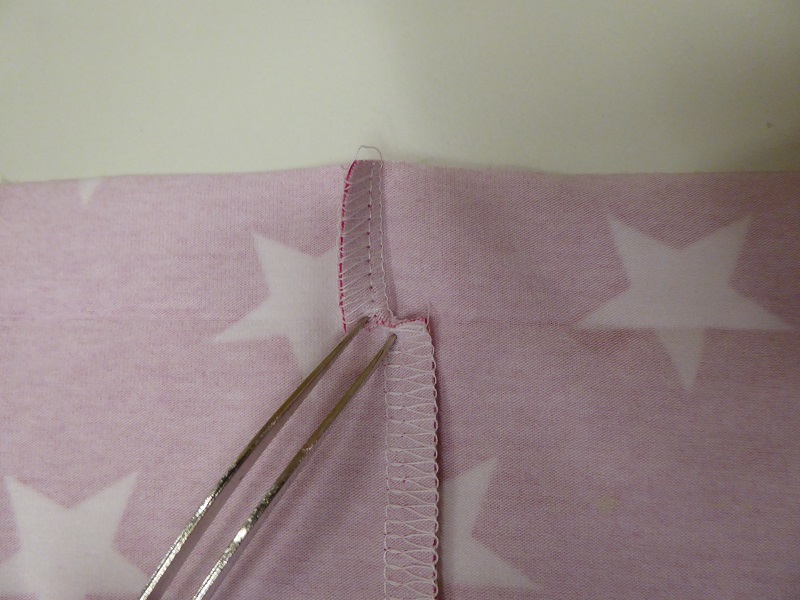
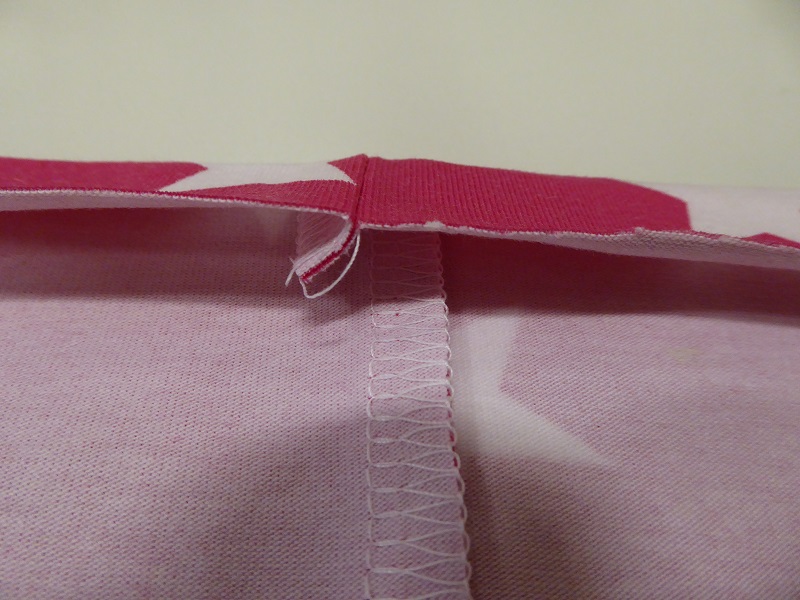
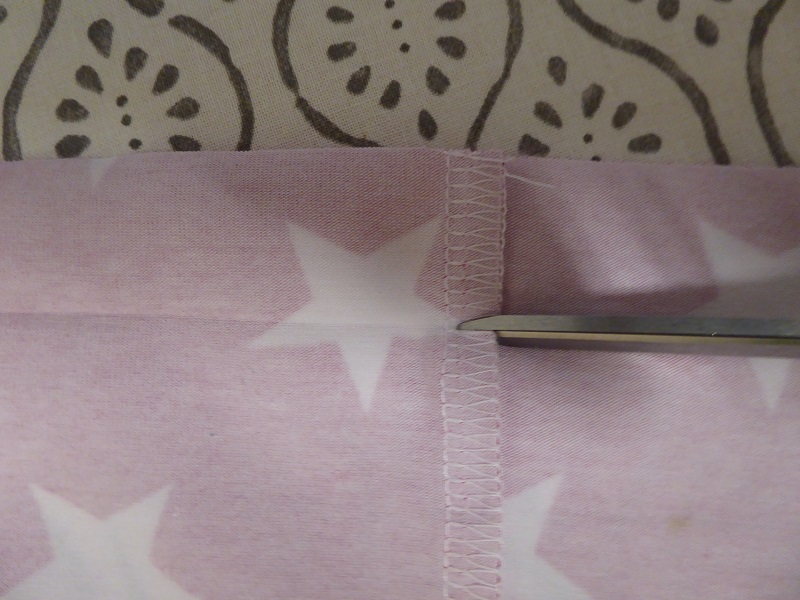
Let's say I am new to this and I have heard about SKIPPED stitches when going over side seams and I'd like to avoid those unruly stitches! ![]() Then I might choose to snip the seam just on the fold of the hem, but without actually touching the left needle thread of the overlocked seam.
Then I might choose to snip the seam just on the fold of the hem, but without actually touching the left needle thread of the overlocked seam.
Preparing for reverse stitching
Let's say I also want to try a reverse coverstitched hem. Then I would first overlock the edge of the fabric, press the hem and if I were still nervous about SKIPPED stitches, I would probably snip as explained above.
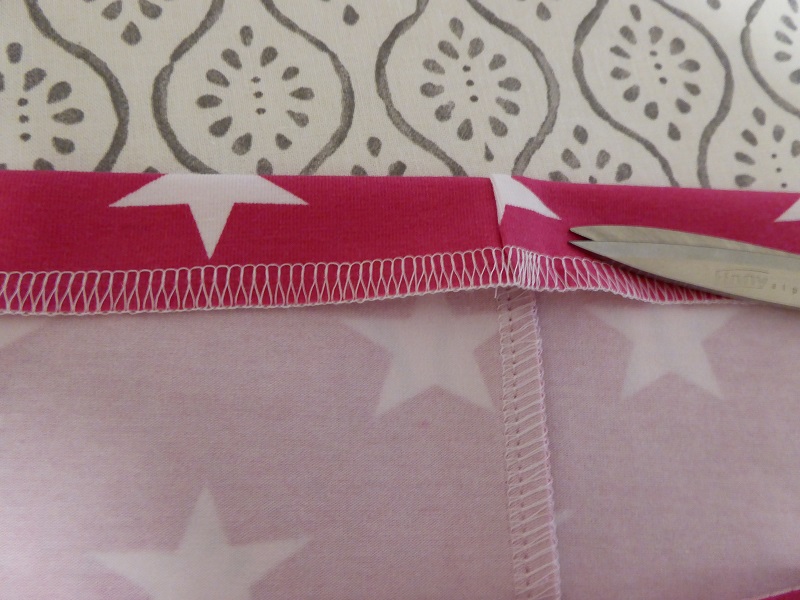
In this case I didn't snip and you will see later how it affects the stitch. I am all ready to start sewing, all I need is to choose some needles, thread and the settings on my Coverstitch machine.
Starting to sew
I have set up my machine with 2 needles ELX705 SUK size 90/14 in the left and centre position to start off. I am using regular polyester sewing thread on cones in the needles and woolly nylon in the looper.
SETTINGS:
Needles 4
Looper 0.25
Stitch length 2.75
Differential 1.3
To start sewing, I am putting a folded scrap of fabric underneath the foot and I keep the threads North-West.
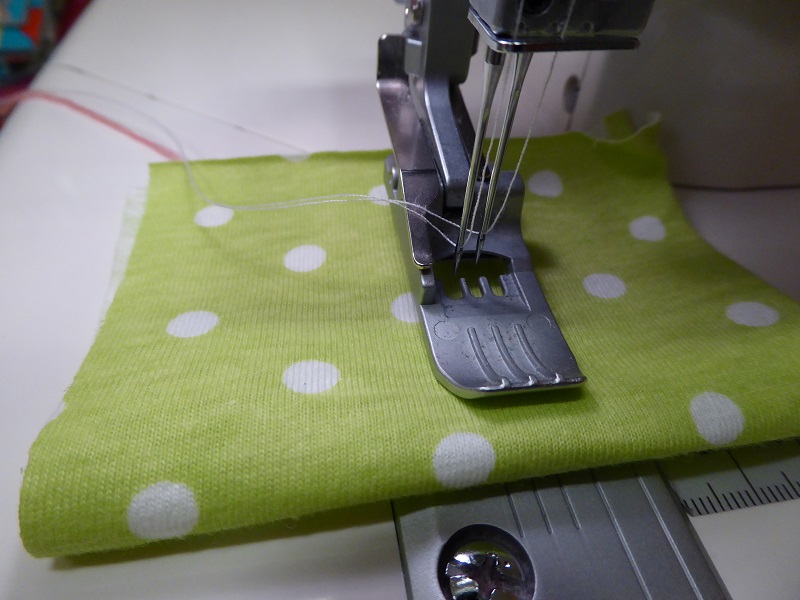
Specific info for settings on the Janome Cover Pro can be found here.
Flat hemming
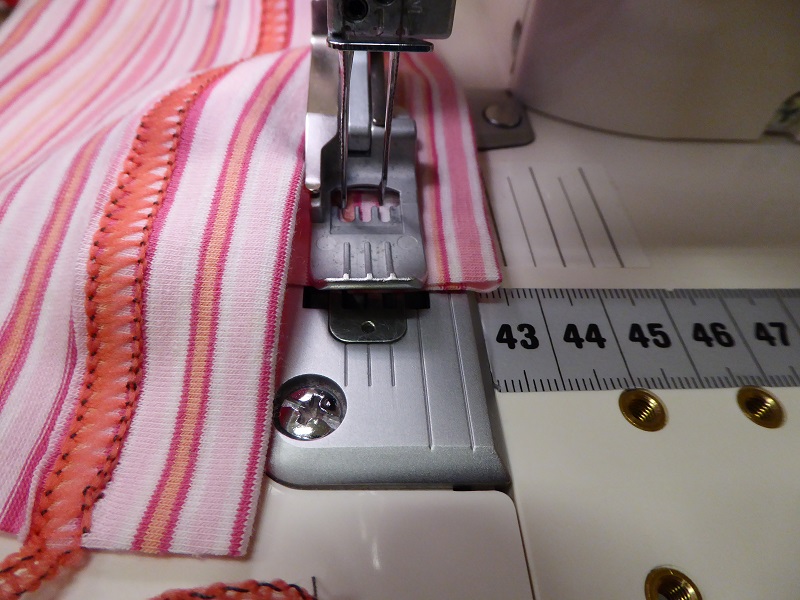
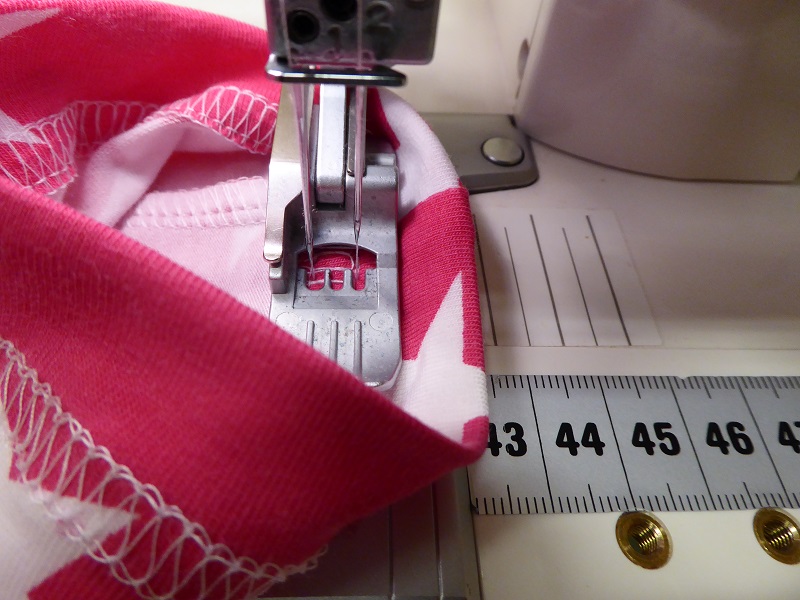
Now it is important to guide the pre-pressed hem so that the left needle hits the fabric as close to the edge of the fabric as possible so that it gets neatly wrapped by the looper thread. I have stuck a piece of self adhesive measuring tape on the bed of the machine and aligned it so that the distance from the left needle corresponds to the measurement that can be read on the tape. Sorry if the numbers are confusing: 42.5 means 2.5 cm/1 inch from the left needle.
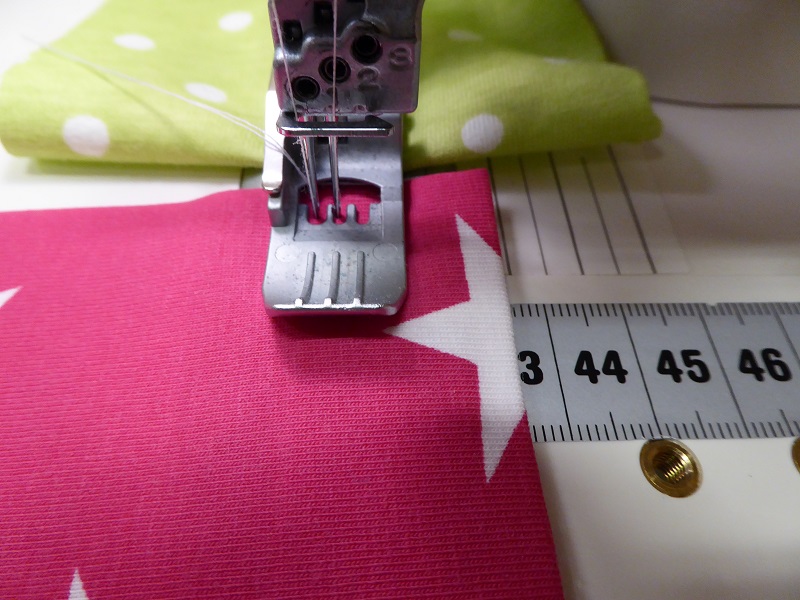
And this is the result with the narrow coverstitch using woolly nylon in the looper.
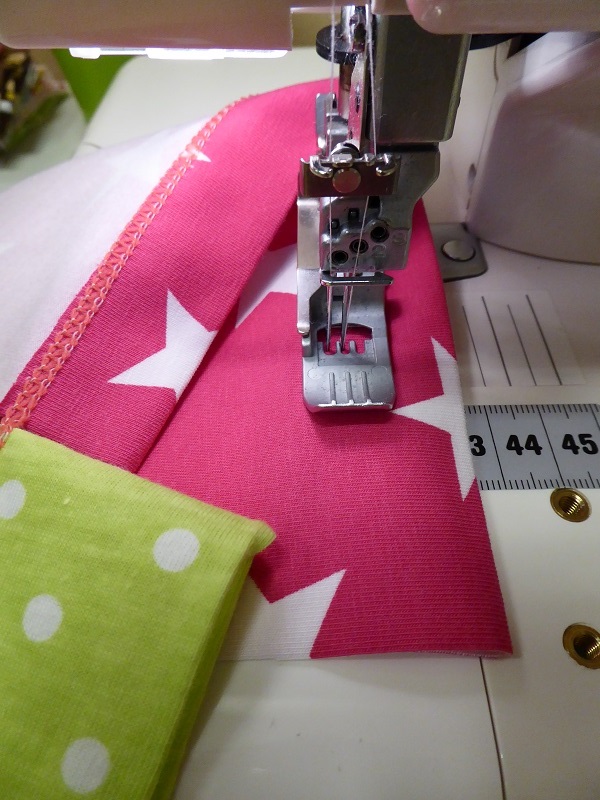
Then I have moved the centre needle to the right position because next I want to try a wide coverstitch. I have moved the needle but I didn't re-thread. No need to, the thread doesn't know where it is coming from and it will perform well as long as it can run freely along its path. Depending on the brand of machine you are using, it may be a good idea to check if the guide just above the needle is letting the thread pass easily, otherwise, switch the position of the thread accordingly. If you compare the image below and above, you will notice that I used the right guide (blue arrow) also for the narrow coverstitch and it worked great.
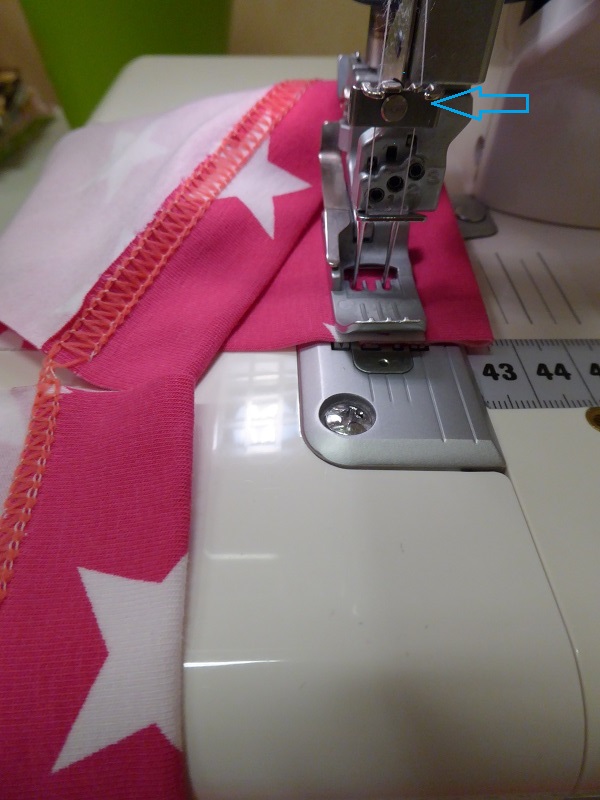
Next I have changed the looper thread to show the difference between polyester sewing thread and woolly nylon. I have increased the looper thread tension to 1.5 but all other settings remain identical. Please feel free to experiment with tension settings, they may differ between brands and even between individual machines of the same brand.
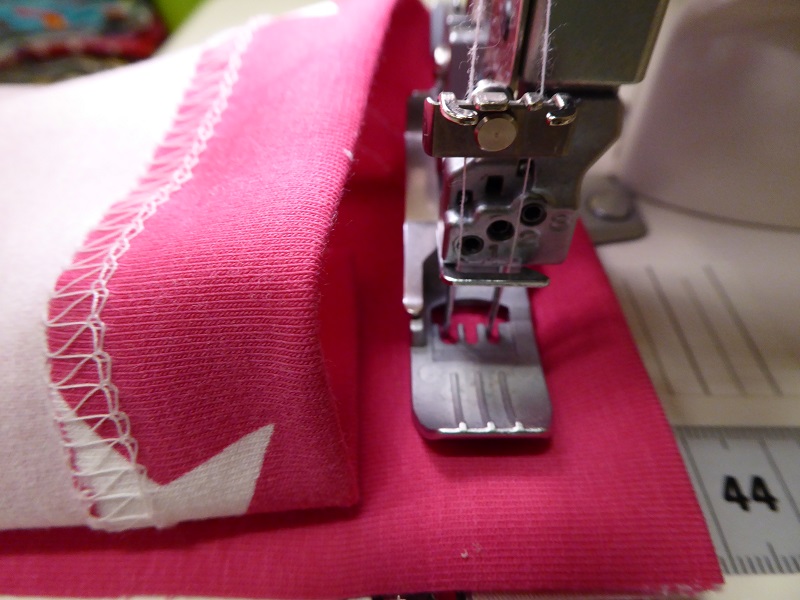
Now I am ready to try that reverse coverstitching. In this case I am guiding the fabric so that the left needle penetrates the fabric just a little to the right of the overlocked edge.
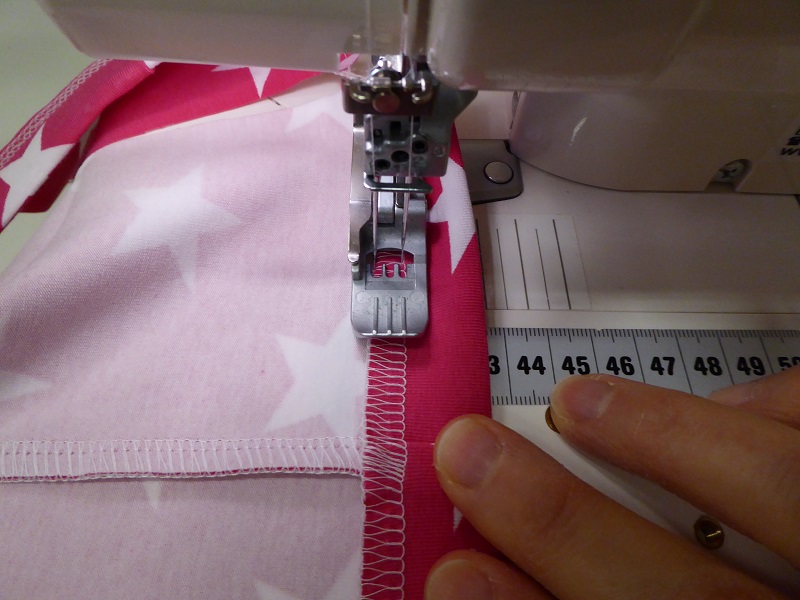
Notice the needle threads just to the right of the overlocked edge?
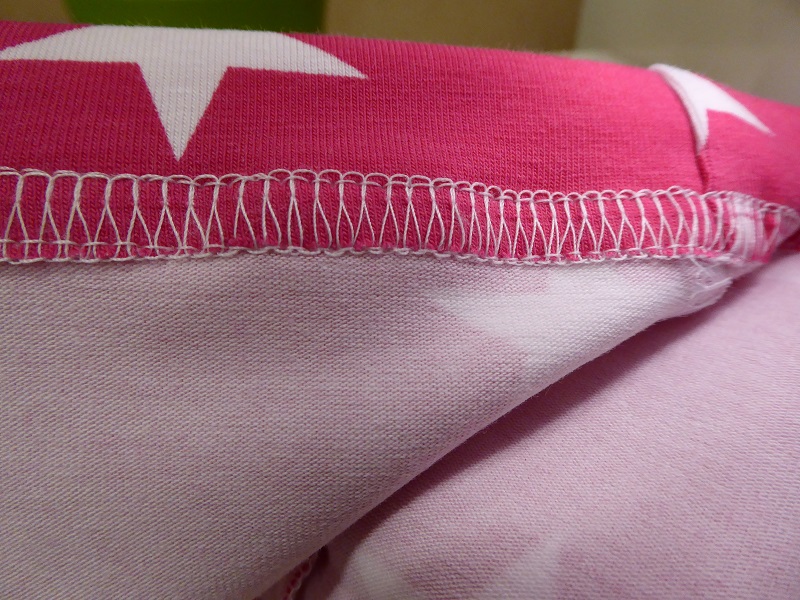
And TADA… that is what the reverse stitched hem looks like! Now it could have been slightly better. Notice that the stitches are getting a little closer when going over the side seam? Snipping the seam would probably improve movement. Another option would be to increase the differential to 1.5 and stretch the fabric a little while sewing but stop stretching when approaching that little hump at the side seam. The increased differential will improve the movement of the fabric.
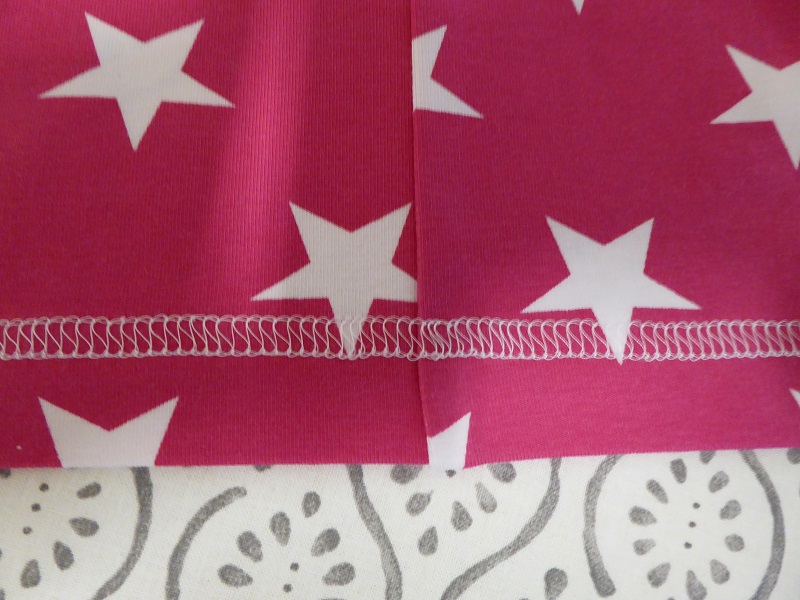
Hemming in the round
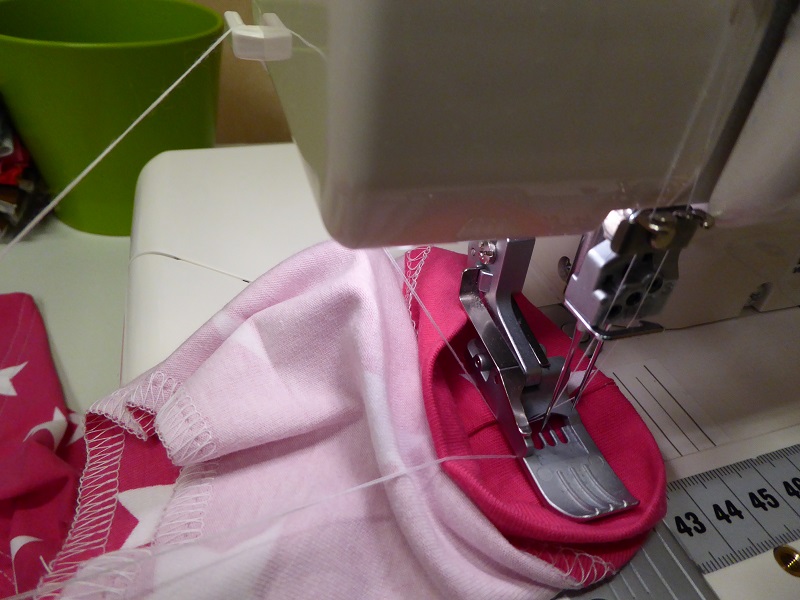
Hemming a sleeve in the round is easiest when the sleeve is turned inside out. The fabric moves around as the coverstitching progresses and even small tubular items such as baby sleeves can be hemmed that way. I like to get started right on top of the side seam.
SETTINGS:
Needles 4
Looper 1.5
Stitch length 2.75
Differential 1.5
It is important to increase the differential setting to allow for some stretching as I sew in the round.
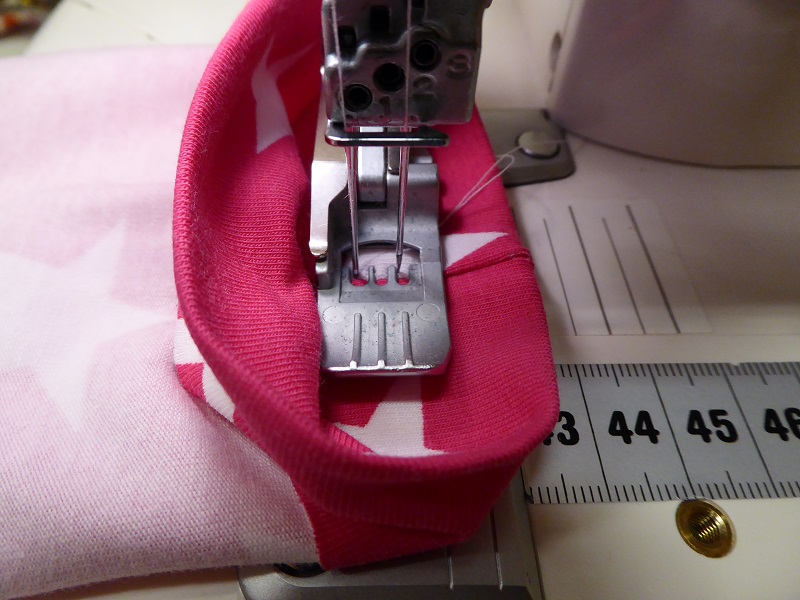
Tying off
When hemming in the round it is important to tie off the threads so that the stitch doesn't start to unravel. Before overlapping the starting stitches, I snip the starting threads. There is almost no risk that stitches at the beginning will become undone.
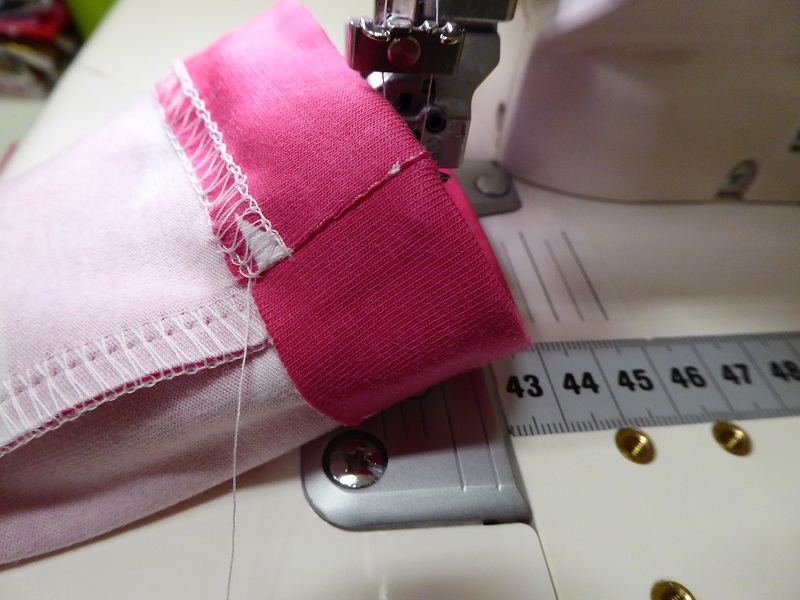
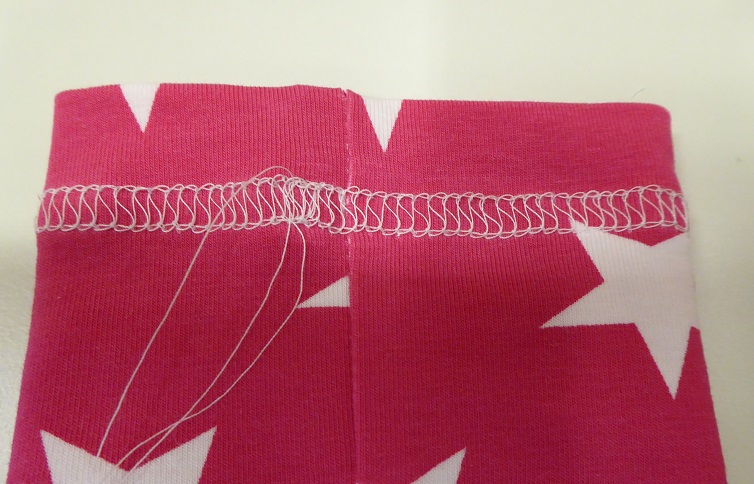
Then I make sure to overlap the starting stitches about 1.25cm or half an inch.
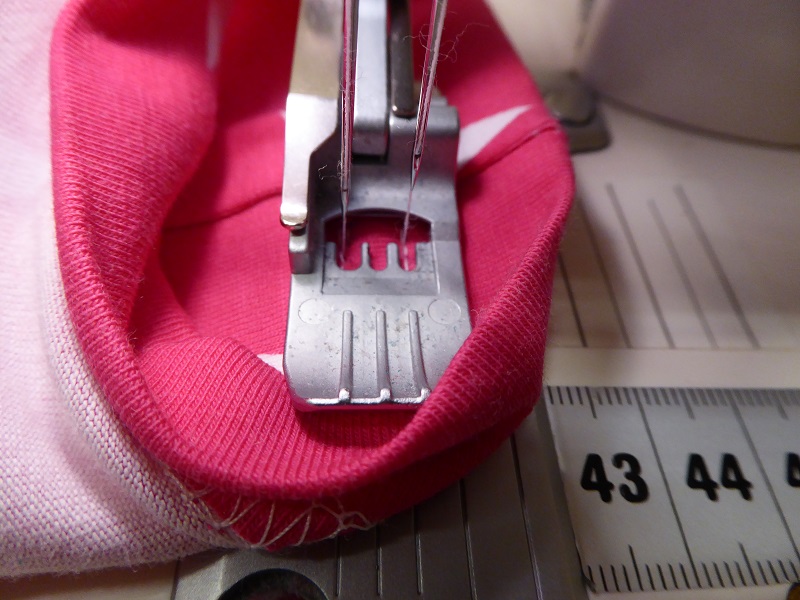
Then I raise the presser foot to release the tension, I bring the needles to the highest position by turning the hand wheel counter clockwise. Using an Allen key or another thin tool, I catch the needle threads underneath the presser foot and I pull them forward gently till I have about 20 to 30 cm (8 to 12 inches). Then I cut the needle threads.
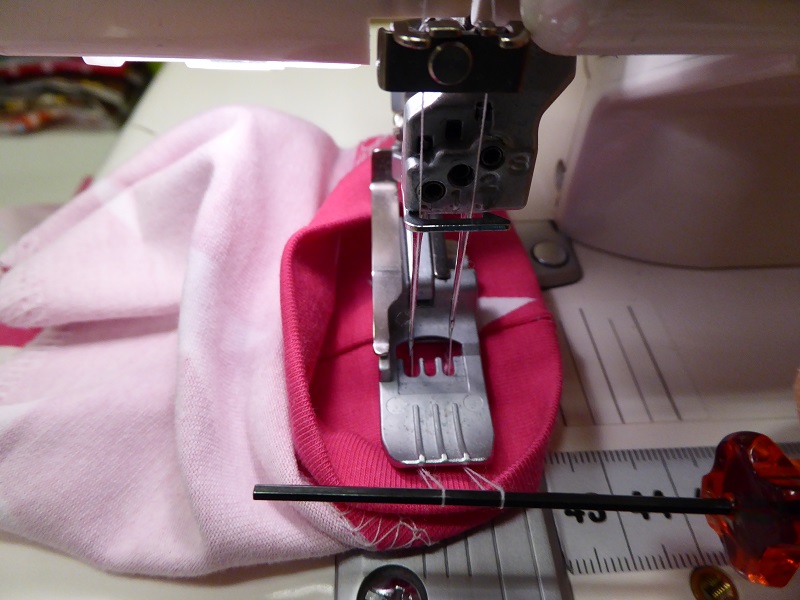
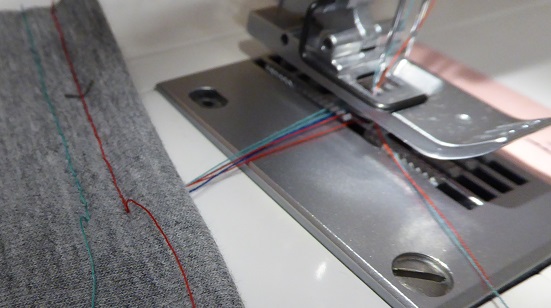
Next I pull the fabric towards the left and slightly backwards to bring out the looper thread and I snip it the same length as the needle threads. Depending on the type of thread I am using, I may encounter a bit of resistance. That is normal and a good tug will help to release the threads. Here is what it looks like when the needle threads are being pulled towards the wrong side. The threads in front of the presser foot have been snipped and to the left you can see the turquoise and red needle threads being pulled through to the wrong side.
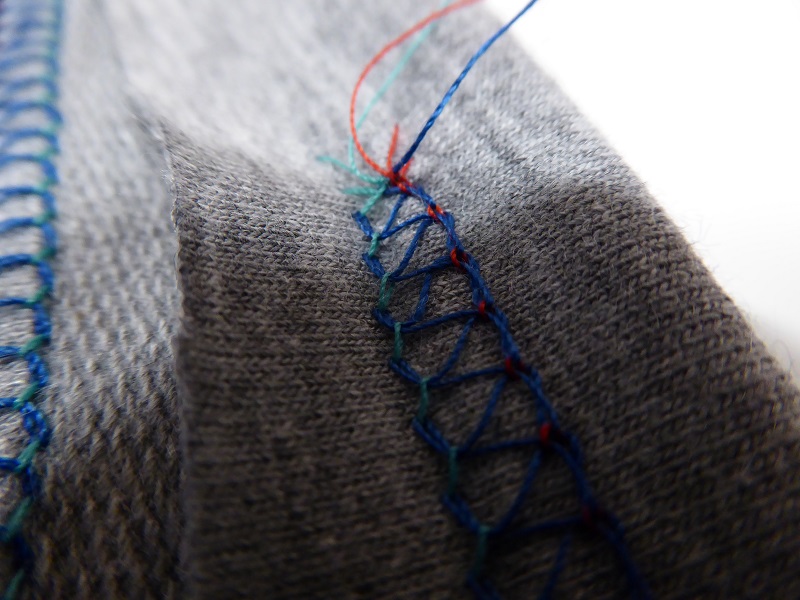
And this is what happens at the wrong side.
I still prefer to secure the threads with a few stitches using a large eyed needle.
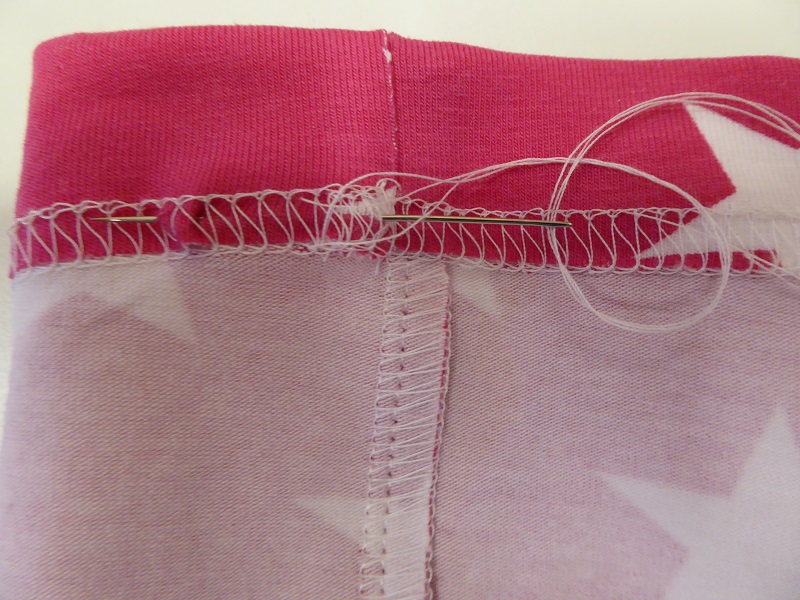
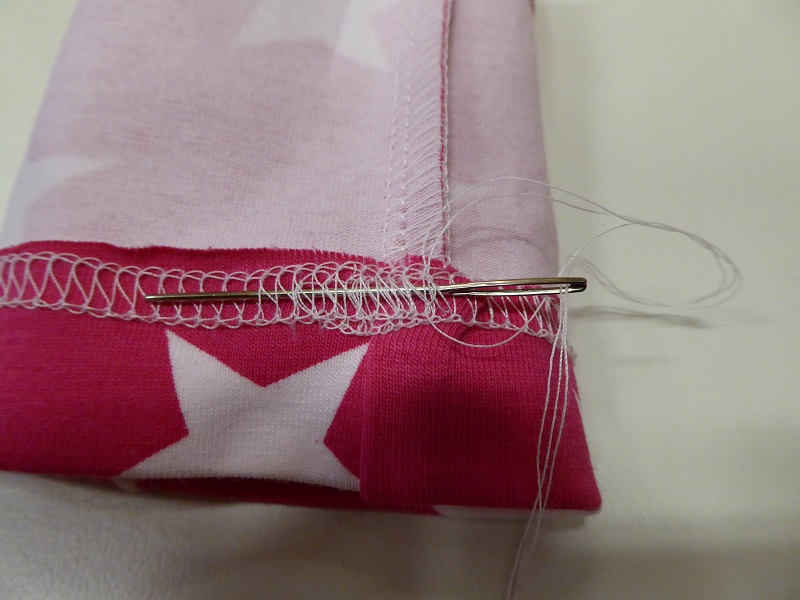
I think the top one looks rather good but if the hem turns out like the one in the image below, don't worry, It will wear and keep just as well. Chances are that the seamstress is the only one to ever look at the stitches in close-up. :D
A reverse stitched sleeve hem
While I am at it I might just as well show a bit of reverse stitching on the sleeve.
In this case, I try to overlap just a few stitches to avoid a mess. The threads have to be pulled towards the wrong side of the fabric and secured with a few stitches.
Avoiding tunnelling
Imagine I have this very thin slippery and stretchy fabric and I want to hem it and it keeps tunnelling like the example at the bottom:
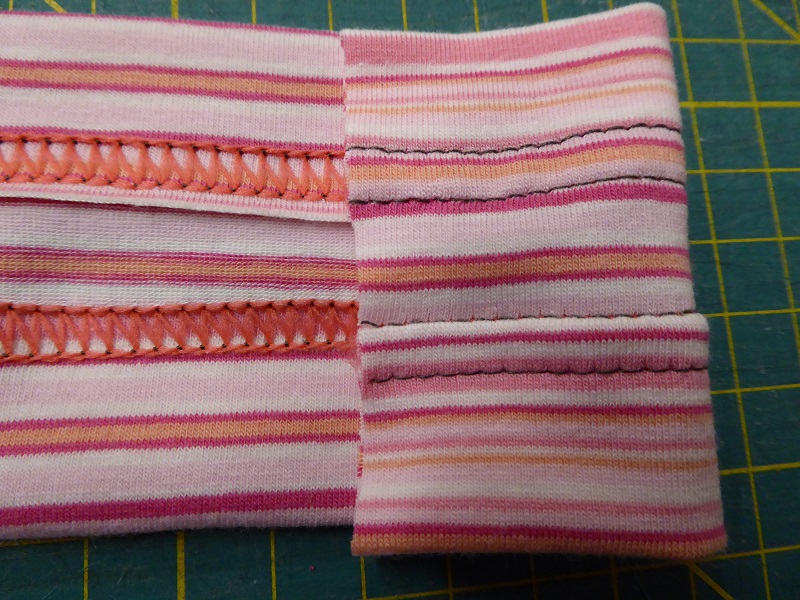
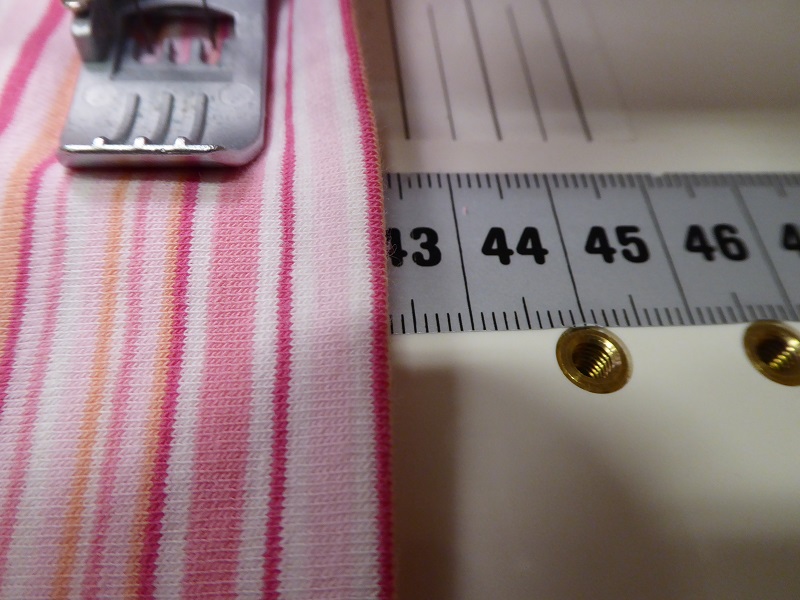
To get a flat hem like the top one, I am making sure that the left needle hits the fabric 1 or 2mm (1/16 inch) to the right of the edge of the fabric. This means that I am guiding the folded hem along the 2.3cm mark.
Alternatively, I could use a narrow 2 needle coverstitch. This one tends to cause less tunnelling but it takes more care to make sure to catch the edge when the stitch is only 3mm wide.
For more about tunnelling check this.
The lazy-fold-as-I-go hem
For long ruffles with a narrow hem, I don't hesitate to measure as I go. I fold the hem, quickly checking with my gauge.
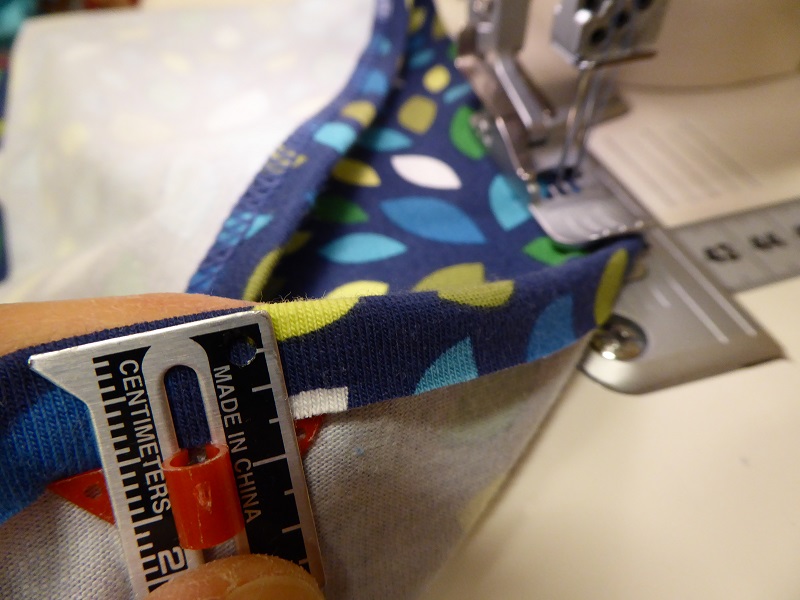
Then I hold the folded part slightly stretched with my left hand and I place my right finger just beside the spot where the edge of the hem should pass so it doesn't shift sideways while I am stitching.
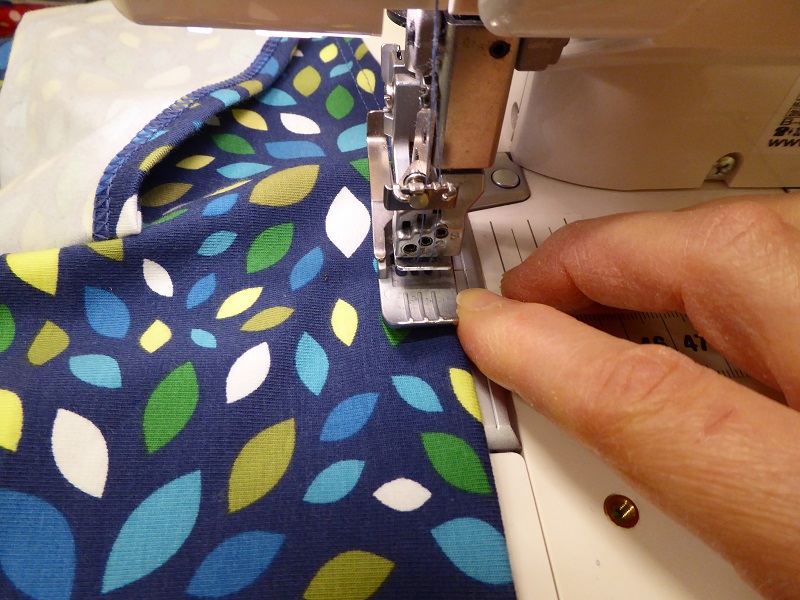
In fact, once I got comfortable with hemming, I started using this fold-as-I-go method more and more.
If you have more questions, comments or if you would like to talk about coverstitching, please join me at https://www.facebook.com/groups/Hilde.Coverstitch/
Extra stretchy
If you want your hem to be really stretchy, check this.

